IgxGrid の編集機能では、デフォルトエディタの代わりに好きな入力エディタを使うようカスタマイズすることができます。IgxSelect を組み込んでみます。
1. IgxSelectModule を import します。また FormsModule も import しておきます。
import { BrowserModule } from '@angular/platform-browser';
import { BrowserAnimationsModule } from '@angular/platform-browser/animations';
import { FormsModule } from '@angular/forms';
import { NgModule, LOCALE_ID } from '@angular/core';

import { registerLocaleData } from '@angular/common';
import localeJa from '@angular/common/locales/ja';
registerLocaleData(localeJa);

import {
  changei18n,
  IgxGridModule,
  IgxSelectModule
} from 'igniteui-angular';
import { IgxResourceStringsJA } from 'igniteui-angular-i18n';
changei18n(IgxResourceStringsJA);

import { AppComponent } from './app.component';

@NgModule({
  declarations: [
    AppComponent
  ],
  imports: [
    BrowserModule,
    BrowserAnimationsModule,
    FormsModule,
    IgxGridModule,
    IgxSelectModule
  ],
  providers: [
    { provide: LOCALE_ID, useValue: 'ja-JP' }
  ],
  bootstrap: [AppComponent]
})
export class AppModule {}
2. igxCellEditor ディレクティブを使ってセル編集テンプレートを定義し、中に IgxSelect を置きます。
    <igx-column [field]="'column1'" [editable]="true">
      <ng-template igxCellEditor let-cell="cell">
        <igx-select [displayDensity]="grid.displayDensity"
                    [(ngModel)]="cell.editValue">
          <igx-select-item *ngFor="let item of items"
                           [value]="item">
            {{ item }}
          </igx-select-item>
        </igx-select>
      </ng-template>
    </igx-column>
IgxSelect と cell.editValue を ngModel で双方向バインディングするのがポイントです。※そのために FormsModule が必要になります。
items は IgxSelect で表示したいコレクションです。ngFor で IgxSelectItem をループします。各 item の値を value プロパティにバインドします。
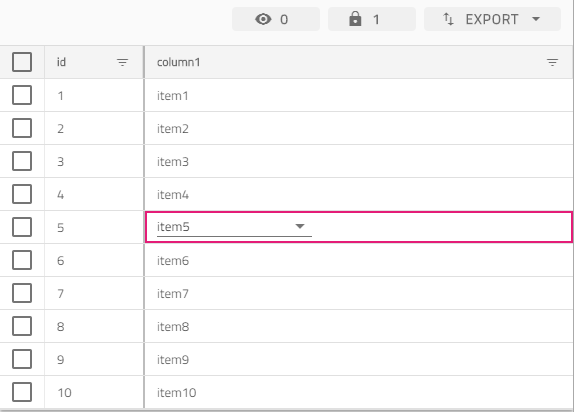
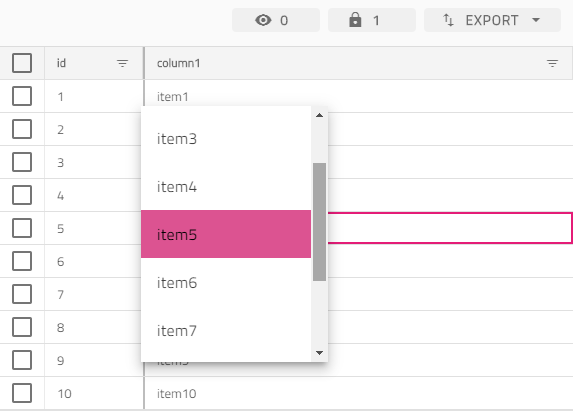
結果