IgxGrid の列を動的に生成する方法を紹介します。
列とデータの準備
あらかじめ列定義とバインドするデータを用意しておきます。
data: any[];
columns: any[];

ngOnInit() {
	// 列の定義
	this.columns = [
	  { field: 'ID', headerText: 'ID', width: 100, resizable: false, pinned: true },
	  { field: 'Name', headerText: '名前', width: 150, resizable: false, pinned: true },
	  { field: 'Location', headerText: '勤務地', width: 100, resizable: true },
	  { field: 'Department', headerText: '部署', width: 100, resizable: true },
	  { field: 'PostalCode', headerText: '郵便番号', width: 120, resizable: true },
	  { field: 'Prefecture', headerText: '住所1', width: 100, resizable: true },
	  { field: 'Address', headerText: '住所2', width: 250, resizable: true },
	  { field: 'Phone', headerText: '電話番号', width: 150, resizable: true }
	];
	// データ
	this.data = [
	  { 'ID': 105, 'Name': '森上 偉久馬', 'Location': '東京本社', 'Department': '第一営業', 'PostalCode': '1900003', 'Prefecture': '東京都', 'Address': '立川市栄町 4-18-XX', 'Phone': '(0425)25-05XX' },
	  { 'ID': 107, 'Name': '葛城 孝史', 'Location': '東京本社', 'Department': '第二営業', 'PostalCode': '1530064', 'Prefecture': '東京都', 'Address': '目黒区下目黒 3-16-XX', 'Phone': '(03)3714-75XX' },
	  ...省略(詳しくは添付サンプルを参照)...
	  { 'ID': 307, 'Name': '小川 さよ子', 'Location': '北九州支社', 'Department': '営業二', 'PostalCode': '8160825', 'Prefecture': '福岡県', 'Address': '春日市伯玄町 2-X', 'Phone': '(092)591-64XX' },
	];
}
IgxGrid の定義
配列 columns をループで回し、IgxGridColumn(igx-column) を動的に生成しています。field、header、width といった列オプションの値設定以外にも、列変更機能(resizable) や列固定機能(pinned)の設定も、配列 columns の各要素の値が反映されます。
<igx-grid #grid1 [data]="data"
  [width]="'700px'" [height]="'300px'"
  [displayDensity]="'compact'">
    <igx-column *ngFor="let c of columns"
          [field]="c.field"
          [header]="c.headerText"
          [width]="c.width"

          [resizable]="c.resizable"
          [pinned]="c.pinned"
          [sortable]="true"
          [movable]="true">
    </igx-column>
</igx-grid>
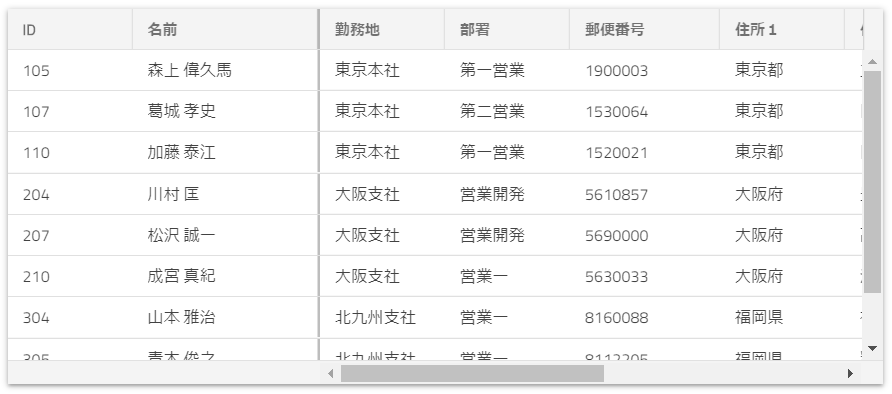
実行結果