Ignite UI for Web Components が提供するグリッドコンポーネント IgcGrid では、セルの内容をカスタマイズするためにbodyTemplateを利用できます。これにより、セル内にハイパーリンクを配置することが可能です。
今回は、データグリッドの「Product URL」という列に、各行ごとの URL を持ったリンクを表示する方法を紹介します。
カスタムテンプレートを使用したハイパーリンクの配置
次のコードでは、url フィールドを基にして、セルの中に <a> タグを出力し、さらにリンクに title 属性を付与するbodyTemplateを定義しています。
const urlColumn = document.getElementById("urlTemplate") as IgcColumnComponent;
urlColumn.bodyTemplate = (ctx: IgcCellTemplateContext) => {
  const value = ctx.cell.value;
  const name = ctx.cell.row.data.name;
  return html`<a href="${value}" target="_blank" title="${name}'s URL">${value}</a>`;
};
ここでは、
- ctx.cell.value にアクセスすることで、そのセルに対応する URL を取得
- ctx.cell.row.data.name にアクセスすることで、製品名を参照
としています。
IgcGridコンポーネントの構築
次に、データグリッドを設定します。
サンプルデータには製品名と紹介ページの URL が含まれており、url 列にだけカスタムテンプレートを適用しています。
<igc-grid id="grid1" height="null">
  <igc-column field="id" header="ID" width="auto"></igc-column>
  <igc-column field="name" header="Product Name" width="auto"></igc-column>
  <igc-column field="url" header="Product URL" id="urlTemplate"></igc-column>
</igc-grid>
import { IgcGridComponent } from "@infragistics/igniteui-webcomponents-grids/grids";

const grid = document.querySelector("#grid1") as IgcGridComponent;
grid.data = sampleData;
サンプルデータ
最後に製品の ID、名前、URL が含まれているサンプルデータを定義します。
export const sampleData = [
  {
    id: 1,
    name: "Ignite UI for React",
    url: "https://jp.infragistics.com/products/ignite-ui-react",
  },
  {
    id: 2,
    name: "Ignite UI for Angular",
    url: "https://jp.infragistics.com/products/ignite-ui-angular",
  },
  {
    id: 3,
    name: "Ignite UI for Blazor",
    url: "https://jp.infragistics.com/products/ignite-ui-blazor",
  },
  {
    id: 4,
    name: "Ignite UI for Web Components",
    url: "https://jp.infragistics.com/products/ignite-ui-web-components",
  },
];
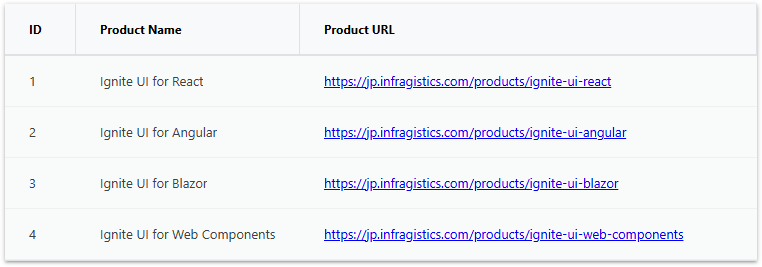
実行結果
上記コードを実行すると、次のように各行の URL がクリック可能なリンクとして表示されます。