Ignite UI for React が提供するグリッドコンポーネント、IgrGrid について、そのセル内にハイパーリンクを配置したい場合は、セル内のレンダリング内容を完全にカスタマイズできるbodyTemplateを使う方法があります。
今回は、データグリッドの「製品紹介ページ」という列に、各行ごとのURLを持ったハイパーリンクを表示するために、bodyTemplateを使います。bodyTemplateは、セルの中身をカスタマイズできるプロパティで、今回の例ではURLをリンクとしてレンダリングします。
カスタムテンプレートを使用したハイパーリンクの配置
次のコードは、データ行の url フィールドに基づいてハイパーリンクを表示するテンプレートを定義しています。
export const App = () => {
  const columnBodyTemplate = (ctx: { dataContext: IgrCellTemplateContext }) => {
    return (
      <>
        <div>
          <a href={ctx.dataContext.cell.row.data.url}>
            <span>{ctx.dataContext.cell.row.data.url}</span>
          </a>
        </div>
      </>
    );
  };
....
};
ここでは、dataContextからセルの行データにアクセスし、その中の url フィールドを使用してリンクを生成しています。
IgrGridコンポーネントの構築
次に、データグリッドを設定します。
今回使用するサンプルデータには、製品の名前と紹介ページのURLが含まれており、IgrGrid の列設定で、url 列にはbodyTemplateを使ってカスタムテンプレートを適用します。
export const App = () => {
  return (
    <div style={{ maxWidth: "800px", maxHeight: "900px", margin: "24px auto" }}>
      <IgrGrid
        data={sampleData}
        primaryKey="id"
        autoGenerate="false"
        width="100%"
      >
        <IgrColumn field="id" width="auto" />
        <IgrColumn field="name" header="製品名" width="auto" />
        <IgrColumn
          field="url"
          header="製品紹介ページ"
          bodyTemplate={columnBodyTemplate}
        />
      </IgrGrid>
    </div>
  );
};
サンプルデータ
最後に製品のID、名前、URL が含まれているサンプルデータを定義します。
export const sampleData = [
  {
    id: 1,
    name: "Ignite UI for React",
    url: "https://jp.infragistics.com/products/ignite-ui-react",
  },
  {
    id: 2,
    name: "Ignite UI for Angular",
    url: "https://jp.infragistics.com/products/ignite-ui-angular",
  },
  {
    id: 3,
    name: "Ignite UI for Blazor",
    url: "https://jp.infragistics.com/products/ignite-ui-blazor",
  },
  {
    id: 4,
    name: "Ignite UI for Web Components",
    url: "https://jp.infragistics.com/products/ignite-ui-web-components",
  },
];
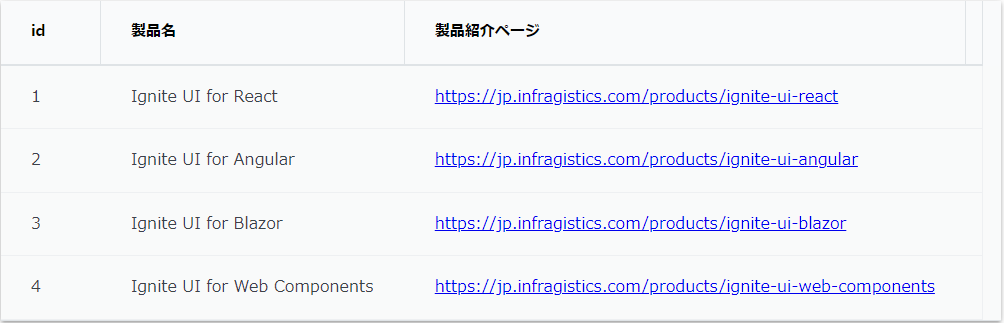
上記コード例の実行結果は以下のようになります。
実行結果